Pages

Sunday 21 November 2010

Chicken Pie with Posh Peas and Carrots

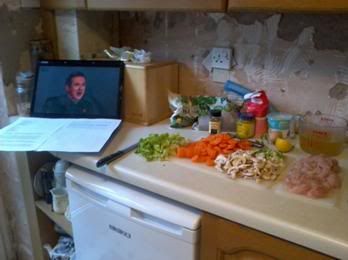
As someone passionate about all things Wigan, I do love a good pie! I especially like creamy chickeny ones and so was excited to try this recipe, another of Jamie’s 30 minute-ers! So, I set myself up in the kitchen and had a lovely Sunday afternoon, plonked in front of the night before’s X Factor, chopping and mixing away. It was really simple to cook as you just make the filling and wack the puff pastry on top. The timing for the other components was also quite easy to do; you just have to keep checking the pie as it can start to catch and burn quite quickly.


For the pie:Photobucket
4x180g skinless chicken breasts
Knob of butter
Bunch of spring onions
150g button mushrooms
1 heaped tbsp plain flour, extra to dust
2 tbsp mustard
1 heaped tbsp crème fraiche
300ml chicken stock
Few sprigs thyme
Nutmeg for grating
1 sheet prerolled puff pastry
1 egg


For carrots:
600g carrots
Few sprigs thyme


For peas:
2 little gem lettuces
Knob of butter
1 tbsp flour
300ml chicken stock
Few springs fresh mint
480g frozen peas
Half a lemon


To start: Get all your ingredients and equipment ready. Turn the oven on to 200°C/400°F/gas 6. Fill and boil the kettle. Put a large wide pan on a medium heat and a large saucepan with a lid on a low heat. Put the thick slicer disc attachment into the food processor.


Chicken pie: Put the chicken breasts on a plastic board and slice into 1cm strips. Put a lug of olive oil and a knob of butter into the hot, large, wide pan.Photobucket Add the chicken and cook for 3 minutes or so. Meanwhile, quickly trim the spring onions and wash the mushrooms, then slice together in the food processor. Add to the pan with 1 heaped tablespoon of flour and stir. Add 2 teaspoons of mustard, 1 heaped tablespoon of crème fraîche and 300ml of chicken stock and stir well. Pick the thyme leaves and stir into the pan with a few fine gratings of nutmeg and a good pinch of salt and pepper. Leave to simmer.

Smash: Trim the carrots, then quickly slice in the food processor. Add to the saucepan with a lug of extra virgin olive oil, a good pinch of salt & pepper and a few thyme tips. Just cover with boiled water, then cover with a lid and turn the heat to high. Cook for 15 minutes, or until tender.

Chicken pie: Lightly dust a clean surface with flour and unroll the sheet of puff pastry. Use a
small knife to lightly crisscross and score it. Take the pan of chicken off the heat. Tip the filling into an ovenproof baking dish slightly smaller than the sheet of pastry (approx. 30 x 25cm). Cover the filling with the pastry sheet, tucking it in at the edges (like in the picture). Quickly beat the egg, then brush it over the top of the pie. Put into the oven and cook on the top shelf for around 15 minutes, or until golden and gorgeous. Fill and reboil the kettle.

Photobucket
Peas: Return the empty chicken pan to a high heat. Quickly wash the lettuces then slice them in the food processor. Add a knob of butter and 1 tablespoon of flour to the pan, then pour in 300ml of chicken stock, tear in the mint leaves and use a balloon whisk to mix to a smooth and bubbling sauce. Add the peas and sliced lettuce. Squeeze over the juice of ½ a lemon, pour in a splash of boiled water, season with salt and pepper, stir, then put the lid on.

Smash: Check the carrots are cooked through, then drain and return to the pan. Taste, correct the seasoning and leave as they are or smash up. Take to the table.

To serve: Take the peas to the table, then get the pie out of the oven and tuck in!Photobucket


This was such an enjoyable meal to cook and eat. The pie looked great and the ‘posh peas and carrots’ worked really well. I love all the little extras like herbs and seasoning, they give this simple food an interesting kick. It did take quite a bit longer than 30 mins I’m afraid Jamie, probably a good hour and a half in total.
I’ve also bought the book since cooking this meal, which is written in a lovely way, with tonnes of amazing photos. I’d definitely recommend it; the recipes all look so exciting, I can’t wait to try them.
Tuesday 2 November 2010

Cauliflower Macaroni

Jamie Oliver is one of my favourite TV Chefs and I love his style of cooking (bar the ridiculous amounts of olive oil he drenches everything in!) so I have been lovvvvvving his new programme; Jamie’s 30 Minute Meals. He cooks several components to a meal in real time, giving lots of hints and shortcuts but without compromising on taste. I decided to give this recipe a go as I love cauliflower cheese and this seemed like an easy twist on that. I have added my own notes and alterations in bold.

Ingredients (Serves 6):
Photobucket
8 rashers of pancetta (I couldn’t find any and so used bacon lardons instead. I chopped them up, fried them and added them to the food processor with the breadcrumbs)
1 large head of cauliflower (This definitely needs more cauliflower for flavour, I’d say 2 heads would be better)
500g dried macaroni
250g mature Cheddar cheese
4 thick slices of country bread
Few sprigs of fresh rosemary
2 cloves of garlic
1 x 250g tub of crème fraîche
Parmesan cheese, to serve

Method:
1)      To start: Get all your ingredients and equipment ready. Fill and boil the kettle. Turn the oven on to 220ºC/425ºF/gas 7. Put the coarse grater attachment into the food processor.
2)     Lay the pancetta in a roasting tray (approx. 30 x 25cm, or large enough to bake the pasta in) and put on the top shelf of the oven. Get rid of any tatty outer leaves from the cauliflower, then trim off the tough base of the stalk and quarter the head. Put in a large saucepan, core down, with the pasta, on a high heat. Cover with boiling water, filling and reboiling the kettle if necessary. Season with a good pinch of salt, drizzle over a little olive oil, then stir and cook according to packet instructions, with the lid askew.
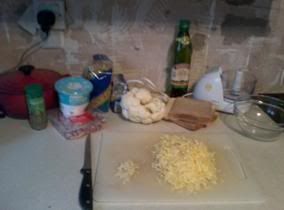
3)     PhotobucketGrate the Cheddar in the food processor and tip into a bowl. Fit the standard blade attachment, then get your pancetta out of the oven and blitz in the processor with the bread, rosemary leaves and a good drizzle of olive oil until you have a coarse breadcrumb consistency.
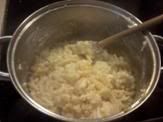
4)     Put a colander over a large bowl to catch the pasta water, then drain the pasta and cauliflower. Tip into the roasting tray you cooked your pancetta in, and put over a low heatPhotobucket (I put it in the pasta pan at this point rather than the roasting tray, then transferred it into the tray for when I put it in the oven to cook the topping). Add 400ml of the reserved pasta water from the bowl (I used about 200ml as 400 would have made it far too watery). Crush in the 2 unpeeled cloves of garlic and mix in the crème fraîche and grated Cheddar, gently breaking up the cauliflower with tongs or a potato masher. Have a taste and correct the seasoning. It should be nice and loose; if not, add another splash of the pasta water.
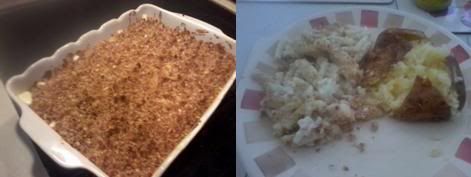
5)     Spread out evenly and scatter over the breadcrumbs. Put on the top shelf of the oven for about 8 minutes, or until golden and bubbling.
6)     To serve: When the cauliflower macaroni is golden and bubbling, take it to the table and shave over some Parmesan.

Recipe taken from Jamie's 30 Minute Meals... by Jamie Oliver ©Jamie Oliver 2010. All rights reserved
Buy the book online
Photobucket
This recipe got a mixed reaction from the family, with some saying it was a bit bland. I think this is due to the lack of cauliflower, and some members getting more than others in their portions. I thought it was nice and garlicky and the topping was lovely with the bacon adding a nice kick to the meal. It was dead easy to make and actually didn’t take too much longer than 30mins. With a few alterations such as more cauliflower, and maybe a serving of peas (that may just be me, I love peas with everything) this meal could be much improved.

Thursday 28 October 2010

Heston's Pea and Pancetta Spaghetti

I must admit I’m not Heston Blumenthal’s biggest fan. I feel that although what he does is undoubtedly very clever, it doesn’t reflect the passion for food and ingredients that I hold. He often puts random things together simply because of the properties they have and how they will look/mess with the mind of the eater. However, when I saw his advert for Waitrose and this meal he created I was pleasantly surprised. It seemed like a really simple and comforting supper, using just a few complimentary ingredients. I decided to try it out on my mum, who’s also very cynical about Mr Blumenthal. (Some of the instructions are very Hestony, with very specific timings etc, you do not need to be this precise and can test the pasta by throwing it against the wall instead if you like. Any excuse!)

Ingredients (Serves 6):
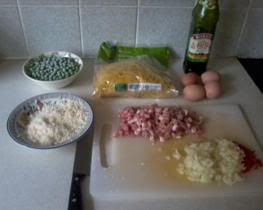
Photobucket
5 tbsp olive oil
2 medium onions, finely chopped
2 cloves garlic, crushed
1-2 fresh red chillies, deseeded and finely chopped
250g pancetta, cubed
450g fresh spaghetti
6 medium egg yolks
100g freshly grated parmesan cheese
250g frozen peas
Freshly ground black pepper

Method:
1) Fill a large saucepan with water, cover with a lid and place over a medium-high heat to bring to the boil.
2) While the water heats up, put the olive oil, onion, garlic and chilli into a large frying pan and place it over a low to medium heat for 5mins, then add the pancetta. Cook for a further 5mins.
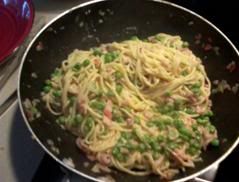
3) Once the water comes to the boil, add the spaghetti and set a timer for 10mins. Stir the spaghetti every few mins to prevent it from sticking together.Photobucket
4) With 3mins left before the spaghetti is cooked, whisk together the egg yolks, parmesan cheese and a ladle of the spaghetti cooking water.
5) With 1min to go before the pasta is cooked, take the pancetta and onions off the heat and add the frozen peas.
6) Strain the pasta and return it to the saucepan. Add the contents of the frying pan and mix together. Add the black pepper and the egg and cheese mixture and allow to sit for 2mins. Stir thoroughly to incorporate everything then serve with some grated parmesan cheese sprinkled on top.
Copyright Heston Blumenthal 2010

Photobucket
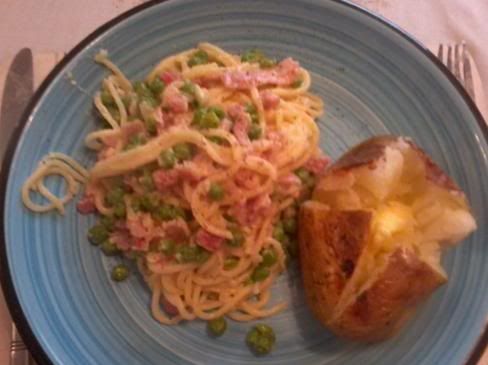
This meal was a great alternative to a carbonara. I love the creamy cheesiness of a carbonara against the tasty pancetta, but I often find it far too rich and avoid ordering it as I know I’ll never finish it. This was just right, giving you the satisfaction and taste of a carbonara, but tasted a lot fresher, was very moreish and had a lovely surprising chilli kick. I didn’t have enough pancetta and so substituted some for bacon which worked fine. I also served with a baked potato for a very fulfilling carbs-fest!

Wednesday 27 October 2010

Sinful Chocolate Cake

I tend to shy away from baking as it scares me a bit. You have to measure things out exactly, pop it in the oven then hope for the best. Whereas with the cooking I normally do you can adjust recipes, constantly taste, check seasoning, and add a little more of different ingredients as you go along.

However, I decided to give it a whirl after my mum told me a simple recipe for a sponge cake . Controversially, I’m someone who is not fond of desserts at all, unless it involves chocolate, and so this sinful chocolate cake was born.

Ingredients:
For the cake -
6oz self raising flour
2oz cocoa (for an ordinary sponge cake, replace this with another 2oz of flour)
1tsp baking powder
8oz caster sugar
8oz butter
4 eggs
For the buttercream:
2oz butter
Icing sugar and cocoa to taste


For the icing:
100g baking chocolate

Method:
1)      Cream the sugar and butter together until smooth.
2)     Mix the flour, baking powder, and cocoa together and add a quarter of this to the creamed butter and sugar, mixing as you go along. Add an egg and beat until combined. Repeat this another three times and continue beating to achieve a light and airy mixture.
3)     Split this between 2 greased and lined sandwich tins.
4)     Place in the oven for 20-25mins at 170°. This does depend on your oven, so keep looking inside to see whether it’s well risen. When it’s done it should rise back up when pressed, you can check this but try not to do it too often throughout cooking as the cake will sink.
5)     Allow the cakes to cool for 10mins whilst still in the tin. Then carefully turn them out onto a cooling rack by first loosening with a knife around the edge.
6)     While the cakes are cooling you can make the buttercream by mixing softened butter, icing sugar and cocoa (leave out the cocoa to make plain buttercream). This can be spread over one of the cake layers before the two are sandwiched together.
7)     For the icing, melt the baking chocolate in a bowl resting over a pan of boiling water. Smooth this over top, I did it nice and thick but you can spread it as thin as you like.
Photobucket
I felt this rich cake definitely needs to be served with a glass of milk or some cream over the top. It was very satisfying to create something so big and beautiful that could be offered to guests for the next couple of days. The cake was lovely and moist with different textures provided by the buttercream and icing. You could also add a layer of blackcurrant jam for an extra dimension. I quite enjoyed making the cake and will definitely be baking again. I loved wearing my pinny, getting flour all over my face and licking the mixing bowls clean!

Seafood Chowder


I had the urge to study my favourite cookery book this week: 'The New Soup Bible' and was inspired to make some soup for the family. I wanted a hearty soup as it was going to be served as a main meal, so decided to make the Seafood Chowder. I love seafood but had never had a fish based soup so was really excited to try this, especially while it involved rice, which I love as an ingredient in soup (e.g. Mulligatawny). I feel it adds a whole new layer to the enjoyment of soup, with a lovely oozy texture similar to that of a risotto.

Another item I had never tasted was the scallops. I visited the food market in Wigan for a lot of the ingredients and was pleased to find the scallops, along with the other vegetables I bought, were relatively cheap (about £4 for four large frozen scallops). It felt really good to browse the market for fresh local produce and talk properly to the sellers about how it would be used. The other fish I used was cod, as we’d just had a delivery from ‘the fish man’ and this went really well with the cream, as would haddock. You could also use another white fish such as monkfish or plaice.

Here is the recipe with my own pictures and notes. I am aware of the mix of imperial and metric units but I am part of a generation who has no idea which to use for what and so settle for a healthy mix of both.


Ingredients (Serves 4):
Photobucket
1 cup drained tinned sweetcorn
1 pint milk
1 tbsp butter
1 small leek, sliced
1 garlic clove, crushed
2 smoked streaky bacon rashers, chopped
1 small green bell pepper, seeded and diced
1 celery stalk, chopped
115g white long grain rice
1 tsp plain flour
450ml chicken or veg stock (I use Knorr stock pots, which are pots of rich jellified stock)
4 large scallops (preferably with corals)
4oz white fish fillet (I used a couple of pieces of cod)
1 tbsp fresh parsley, finely chopped
Good pinch cayenne pepper
3 tbsp single cream
Salt and pepper


Method:
1)      Place half the corn kernels in a food processor or blender. Add a little of the milk and process until thick and creamy. Don’t worry about how unappetising it looks at this stage!
2)     Melt the butter in a large pan and gently fry the leek, garlic and bacon for 4-5mins until the leek has soften but not browned. Add the diced green pepper and chopped celery and sweat over a very gentle heat for 3-4mins more, stirring frequently.
3)     Stir in the rice and cook for a few mins until the grains begin to swell. Sprinkle over the flour. Cook, stirring occasionally for about a minute, then gradually stir in the remaining milk and stock.
4)     Bring the mixture to the boil over a medium heat, then lower the heat and stir in the creamed corn mixture, along with the rest of the sweetcorn. Season well with salt and pepper.
Photobucket
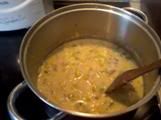
5)     5) Cover the pan and simmer the chowder very gently for 20mins or until the rice is tender, stirring occasionally, adding a little more stock or water if the mixture thickens too quickly or the rice begins to stick to the bottom of the pan.
a>
6)     While the soup is simmering you can prepare the seafood. Pull the corals away from the scallops and slice the white flesh into ½ inch pieces (I didn’t manage to get scallops with the corals and so did without which was fine, but the resulting dish was less colourful). Cut the fish fillet into bite size chunks.
7)     Stir the scallops and fish into the chowder, cook for 4mins, then stir in the corals, parsley and cayenne. Cook for a few minutes to heat through, then stir in the cream, if using. Adjust the seasoning to taste and serve.
Photobucket
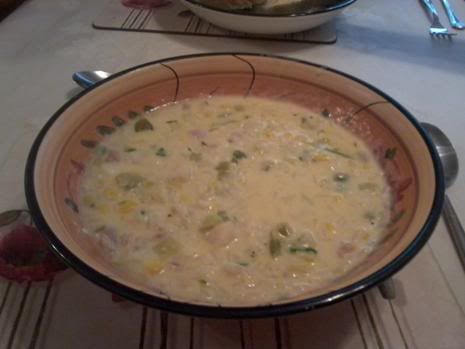
My family and I thought this soup was tasty and filling, with its creamy, satisfying texture. It was a great soup for mopping up with crusty bread, and I really enjoyed having seafood as part of a soup. The recipe itself was fairly easy with its ‘one-pot’ nature, and took about 45mins to prepare and cook. However, I was slightly disappointed by the scallops, with it being my first time tasting them. I have heard that they are a very delicate taste and I fear it was somewhat overwhelmed by the soup, and so I didn’t really feel like I’d had them. I am eager to try this delicacy in another recipe, using the scallops as the star of the dish.